Managing Images
- A series of buttons below the image allow you to
easily manage images. The total number of images for the cultivar(item) is displayed
below the buttons.
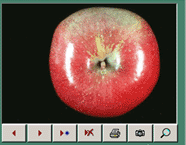
The first two buttons allow you to move forward and back  through the
images available for the current cultivar (item). The third button allows you to add new
image to the current cultivar (item) . Click the through the
images available for the current cultivar (item). The third button allows you to add new
image to the current cultivar (item) . Click the  and browse to the image file. The file will be copied to the ‘Images’ folder in
the Unibase directory.
and browse to the image file. The file will be copied to the ‘Images’ folder in
the Unibase directory.
To delete an image click the fourth button from the left  . You will be
prompted as to whether you want to simply remove the association of the image with the
current cultivar or whether you want to delete the image file as well. . You will be
prompted as to whether you want to simply remove the association of the image with the
current cultivar or whether you want to delete the image file as well.
You can print a copy of the current image by clicking the ‘Print Image’ button  . .
If you have a scanner or digital camera installed you can acquire images directly by
clicking the ‘Scan Image’ button  . The program
prompts you to choose your TWAIN compliant scanner and then opens that device’s
interface. Once the scan is complete you need to name and save the image file. The images
thus acquired are saved in JPG format. . The program
prompts you to choose your TWAIN compliant scanner and then opens that device’s
interface. Once the scan is complete you need to name and save the image file. The images
thus acquired are saved in JPG format.
The rightmost image button  (‘Zoom Image’) opens a window that displays the
current image in a larger format. (‘Zoom Image’) opens a window that displays the
current image in a larger format.
Note that to correctly display
images in Unibase you must set your display settings to minimum of 16 bit color (click on
start, setting, control panel, display, setting for windows 2000). Setting the display to
24 bit or 32 bit color will further enhance the quality of image display.
NOTE: YOU MUST
already have a "Database", "Category", "Common name" and
"Cultivar (Item)" before adding an image. |